Backcountry Skiing – Where to start?
.jpg)
Backcountry skiing: I have some questions and want to get started.
Backcountry skiing. The idea is simple: find fresh powder and ride it all day, sharing the memorable experience with only a few, if any others. That is, more or less where the simple part ends. But that’s why we are here. As long as you have the proper help or knowledge and gear, the experience should be nothing short of a great one. We’ll take things one step at a time.
What exactly is backcountry skiing?
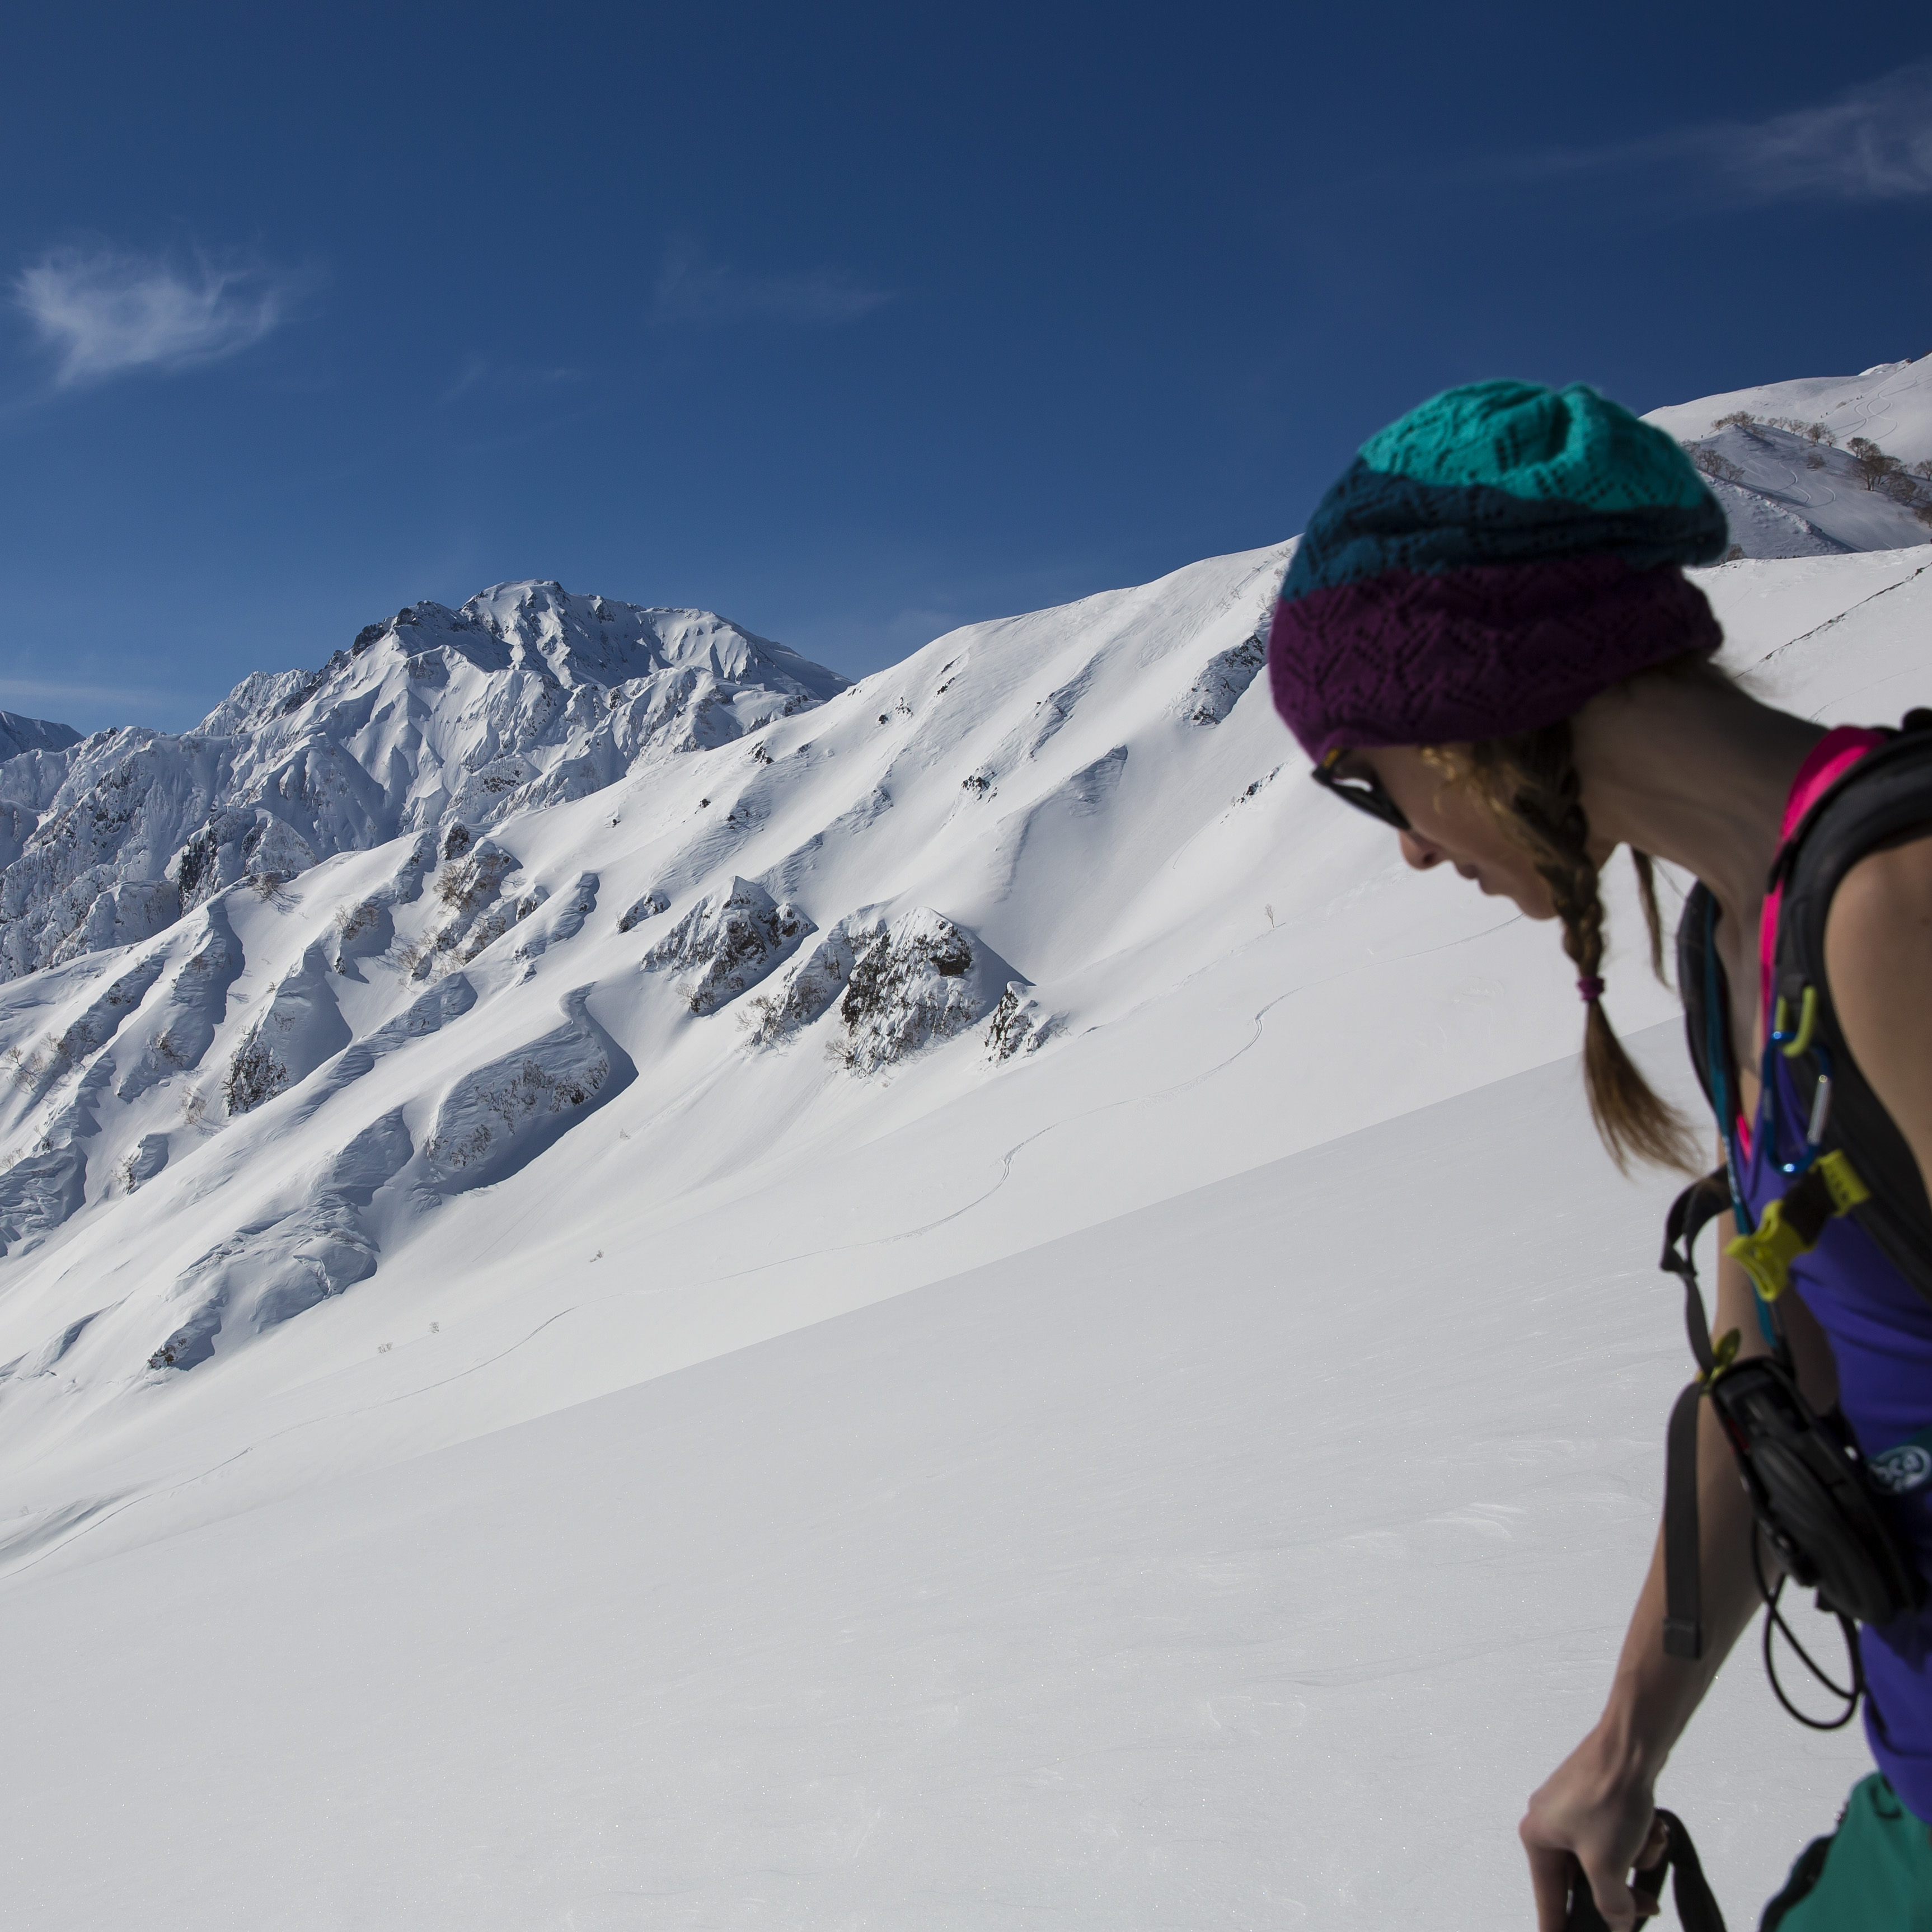
Backcountry skiing is most simply summed up as any skiing outside of the resort. In some places, this means off of the cut and maintained piste. In other places, this means the more ambitious act of going out of gates and leaving the resort altogether. Backcountry skiing can also be far away from chairlifts, where one starts hiking up from the bottom of the mountain for their turns.
Fortunately in Japan, things are made easy for us. Backcountry skiing will either be far from the resorts where one is hiking for all of their turns, or will be clearly denoted from the resort with a rope, and one will have to exit the resort through a gate. To keep it simple, these forms of backcountry skiing are what I’ll be referring to for the rest of the article.
.jpg)
This sounds simple enough, and for the most part it is with only a few caveats to keep in mind. First, you’re going away from the resort. Whether out of a gate or way off on your own, you’re doing exactly that: going alone. At least proverbially. So if you have a big slope full of fresh snow that nobody has been to, it’s pretty safe to say that there might be unseen hazards. Think of it like the ocean. It sure is pretty, but there are a lot of things going on beneath the surface as well. Hazards such as trees, rocks, can be buried by very little snow, and creeks can be all too easy to fall into. The fact that you’re going away from the resort means help may be several hours if not more to come to you. You might be far from food and water. Or even **gasp** cell phone service. Then there are avalanches, which are the result of snow sliding downhill in an event similar to a landslide (yes, I am being far too brief when mentioning this, but all this is covered in an avalanche course, which it is recommended you take. More on that below.) The good news is none of these things need to be issues if you come prepared for a day in the mountains.
I can deal with creeks, but avalanches don’t sound fun. What do I need to be prepared?
The most important thing any seasoned backcountry skier will tell you they bring with them into the mountains is their mind. Being aware of a situation and being able to critically analyze what’s happening around them is an essential part of their day. They weren’t always that smart though. Everybody has to start somewhere. Most first time backcountry skiers start by hiring a guide which is strongly recommended. A good guide will help you through everything you need from renting the correct gear to making sure you have enough food and water for the day, giving you some tips as to how you can better enjoy the unfamiliar surroundings, and most importantly a guide will help make sure you come home safe. Powder skiing is awesome but it should never be the reason you can’t crack a beer (or ten) and get a delicious hot meal at the end of the day.
Yes. Guides can cost several hundred dollars a day at certain resorts. However, we are talking about more than simple local knowledge to give you the best day possible in the backcountry (which is important as well). Guides are doing what they do for a reason. Most guides spend upwards of 150 days a year on snow whether or not they are working. Guides are there to make sure you stay safe, and are trained in first aid as well as snow safety, just in case something goes wrong. Think of a guide as a walking ski patroller, mountain guru, powder hound, and possibly one of the better skiers on the mountain wrapped all into one package. If they ever aren’t worth the money, the market in Japan is competitive so you’ll know it with a quick look at their reviews online.
I guess this brings me to my next point, which is hiring the right guide. Backcountry skiing is an intimate experience. Shy of sounding like a high school sex education teacher, you should be able to have an open line of communication with your guide. Hopefully they, or their company exchanges several emails with you before your ski day to make things clear what may or may not happen. When your guide picks you up in the morning, they will probably run through a quick checklist to make sure you have all the right gear for the day, and ask where you have been skiing lately. The correct word is calculating. Guides should never be judgmental, and are simply trying to figure out how to give you exactly the day you want. You should always be comfortable telling your guide what is on your mind.
…And if I don’t want to hire a guide?
Take an AST1, or Avalanche Skills Training 1 course. An AST1 will cost several hundred dollars and is general two days in length, so you can fit them in over the weekend. The advantages to this course are obvious: it will give you the skills you need to make decisions on your own so you don’t have to hire a guide. The disadvantages to this course are that you usually have to purchase your own avalanche gear (covered below), and of course there is time spent in a course. On the plus side these courses are run mostly outside so you won’t spend your weekend in a stuffy classroom. You also have an instructor right in front of you for two days who will gladly answer any questions you have about the nuances of backcountry skiing.
Interested in taking an AST course on your next Japan Holiday? Contact us for more info.
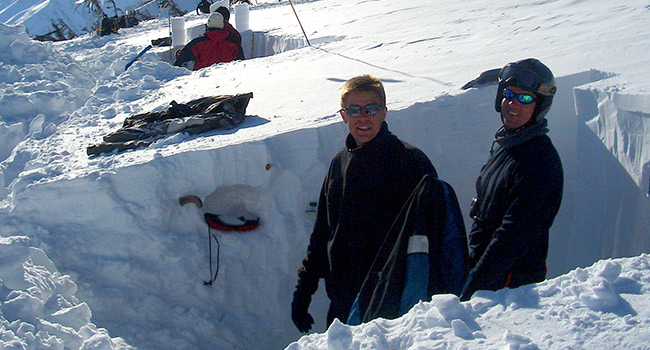
Evergreen outdoor in Hakuba conducting a AST 2 Avalanche Course
You keep mentioning gear. Do I have to go out and buy hundreds of dollars of stuff now too?
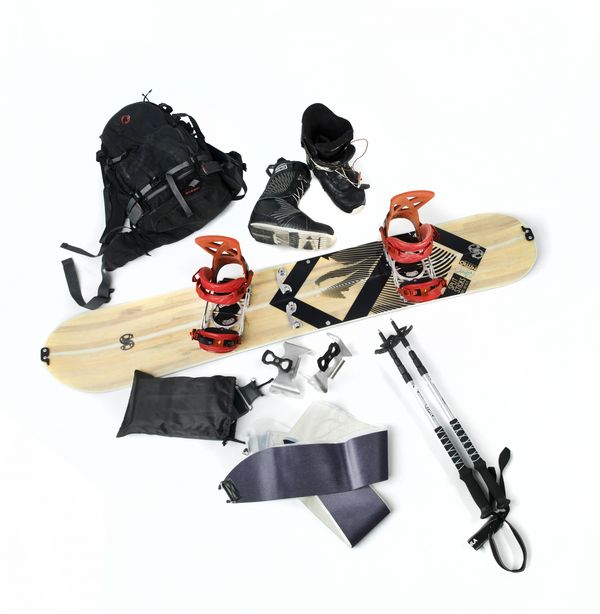
Nope! The beauty of the larger ski resorts in Japan is they usually have a company in the area you can rent gear at. Some guiding companies even have their own gear available to rent. However, if you’ve chosen to go it alone, here’s a (mostly) comprehensive list of what you will need:
Wait. Wait! I don’t want to read all this jargon that’ll take forever. What do you use?
Glad you asked. All my personal gear is listed below, and no, I’m not sponsored. So anything you see me using is because I truly like it, not because I get it for free. That said, you should still give this a read.
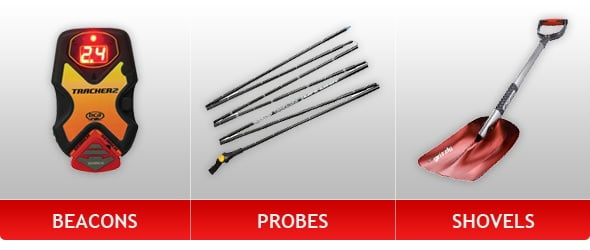
Avalanche Transceiver: The first of the three most important pieces of gear every backcountry skier should have. These generally cost at least 200usd. Mammut, BCA, Pieps, Ortovox, and Arva are the major companies. The major players in the avalanche transceiver game are reviewed in depth here. It is recommended to purchase a transceiver new, not used, to ensure the manufacturer will stand by their product if you encounter problems.
Shovel and Probe: Shovels and probes are the second two of the three most important pieces of gear every backcountry skier should have. I group them together for simplicity because you can usually find a good deal for them paired online. In fact, sometimes you can find a transceiver, shovel, and probe all sold as a package. You want to look for certain features in your shovel as well as your probe. One of the most important features of a shovel is its blade. It should be made of metal, and sturdy. Avalanche debris is hard, you don’t want your shovel to break when it matters the most. Handles are an important consideration. Whether you prefer a ‘D’ or ‘T’ grip is all up to you. With probes in mind, length is an important factor. Ideally your probe should be 300cm, and should have a simple system to deploy. There is a solid resource that goes well into depth on shovels and proves here.
Backpack: You’ll need to carry your stuff around somehow…. You’ll want a backpack that is about 25 to 35 liters with a solid frame that can snugly fit your torso. This is tricky as going too small means you can’t fit all your stuff, but going too big means your gear will flop around in the pack. I find 32 liters to be a sweet spot on this range. Ideally you want the pack to sit high enough on your back that it is off of your butt, allowing for free range of motion between your upper and lower body, but still lets you move your head and neck freely. Most companies have measurements on their website that make it easy to buy a backpack without even trying it on. Some important features that make a backpack easy to use on the hill are a back panel access, a separate pocket for skins, shovel, and probe so your other gear stays dry, and hip pockets for easy access to snacks. It’s important to also look for other features you may or may not want when purchasing a backpack such as a good way to carry your skis or snowboard, a helmet carry, and ways to keep your backpack organized.
Skins: When hiking through deep snow, it is much easier to keep your skis on your feet and walk uphill. Skins have one side that sticks to the bottom of your skis called the glue and one side that provides friction on the snow so you can walk uphill called the plush. Think of the plush side as a magic carpet, except it doesn’t move itself. The main companies that make skins are Black Diamond, G3, Evotech, and Pomoca. Based on the material used to make the plush, skins can be broken down into three main categories: Nylon, Mohair Nylon Mix, and Mohair. These affect cost and performance. Nylon is the cheapest, most durable skin material that also glides the least. Mohair is the more expensive, least durable that glides the most, while the Mohair Nylon Mix is a relative medium depending on the ratio of Nylon to Mohair used. I recommend purchasing Nylon for your first pair of skins as they will last you a long time and they are the cheapest. Personally, I still use the first pair of Nylon skins I purchased over seven years ago. When taken care of, a pair of skins can last a very long time. Store them in a cool, dry place when not in use for long periods of time, and make sure they dry out completely after every use.
Skis with AT bindings: This is a VERY heavily debated topic that deserves its own lengthy article. This is also a hot topic loaded with personal opinions. Avoiding the minefield of personal bias in this topic, I’ll do my best to keep it simple. With regards to skis, it is important to remember you will generally be skiing softer snow than found in the resort, so it’s ok to get a wider ski than what you might otherwise ride. That said, you should be comfortable on this ski. Nothing is worse than getting to the top of a run you worked hard for by hiking all day to have difficulty on the way down because you aren’t familiar with your skis. With regard to bindings, there are many companies that make great products ranging from 90% downhill 10% uphill, to the exact inverse. If I could recommend one solid product that kept me happy through my early years of backcountry skiing, it was the Marker Duke. This binding by all means has its caveats that should be considered, as do all the others.
Splitboard and bindings: Similar to skis and AT bindings, this is a VERY hotly debated topic. All I can do is give the same recommendations I did with skis, which is to purchase a board you will regularly ride and get familiar with so you are happy on it. Nothing is worse than hiking all day to turn around and have difficulty when riding downhill because you aren’t used to your gear.
Poles for Snowboarders: It’s easy to forget, especially as a snowboarder the importance of your arms. Ski poles are critical when walking uphill. They help keep your balance and, in some tricky situations, can be all that prevent you from sliding back downhill. There’s a lot of technique involved in learning to use your poles. Don’t make it more difficult on yourself by purchasing poles that don’t collapse fully and make you the designated radio antennae when riding down. The Black Diamond Compactor Pole seems to be the pole of choice for all my sideways sliding friends. One word of advice: make sure you dry them out well after every use, as they don’t break down if frozen at the top of a run.
Boots: I combined skiers and snowboarders here to share the love. Some of my closest riding friends are snowboarders and I really enjoy the way we all look at terrain differently and influence each other in a good way. That said, keep in mind that when you go into the backcountry, there won’t be a lodge to warm your feet. Make sure your boots feel good, and that it isn’t your first or second time in a new pair of boots.
Avalanche Airbag: Only because it is becoming a hot topic these days, Outdoor Gear Lab has a recently updated review of most of the backpacks out there. That said, if you’re just getting your feet wet, don’t go out and blow at least 500usd on one of these unless you know you will use it a lot. Don’t get me wrong, you can do this if you want, but probably better to put that cash into going skiing more.
My Gear: I chase winter through Japan from early December to early March, then through North America or Europe until early June. I take a break for two months before heading to South America to catch winter from mid August to late November down south, then do it again. I got tired of getting free gear that wasn’t performing the way I wanted a couple years ago, so now I usually pay for my gear because it will do exactly what I want. So at the expense of putting in a bit of a personal plug, I’m sparing you from hearing about what someone uses because they are paid to.
Avalanche Transceiver: Mammut Pulse. I think the Element is a great option if you’re looking for something a bit more affordable.
Shovel and Probe: G3 Spadetech Shovel, D grip. BCA Stealth 300.
Backpack: Deuter Freeride Pro 30
Skins: Black Diamond Ascension Nylon STS or Black Diamond Glidelite Mohair Mix STS
Skis with AT bindings: Praxis GPO with Dynafit Radical FT or Praxis BC with Dynafit Speed Radicals
Splitboard: n/a, though many friends seem to like Arbor and I have yet to see a Jones board last a full season. I’ve played with the Spark Arc and been pretty impressed at the relative simplicity and ease of use of that system.
AT Boots: Dynafit Winter Guide though I have to modify them for my foot to fit. The search for the perfect AT boot continues…
The Extras: As much as this seems like a lot, there’s still more you will need for your day in the backcountry. Everybody likes to eat, so you will need some snacks as well as water to stay hydrated. It’s possible to get by with cheap water bottles, but having had them break in my pack and leave me soaked and my day ruined, I find the Nalgene liter containers are the way to go. If you want to bring a thermos, offering hot drinks on a cold snowy day will make you the most popular member of your group.
There are lots of little trinkets that, if you want, might be nice to bring along. Some people use a separate pair of gloves to hike in. Some people like to bring sunglasses. As easy as it is to forget about the sun, it is usually pretty strong out there and reflecting off all that snow so putting sunscreen on before you head out, and reapplying throughout the day is a really good idea. A lot of these things are relatively small, and not critical to safety. They may be critical to your comfort while out skiing, so it’s important to think of what you like and don’t like. Understand this will take a bit of trial and error to get your system dialed, so planning to tackle the biggest summit in the area on your first day might be a bit ambitious. Remember you will be moving most of the time, and probably working harder than you’re used to when skiing in the resort, so a breathable jacket is a good idea. Several thinner layers are warmer and more comfortable than one thicker layer. And when you stop moving, it gets cold quickly, so a spare warm layer that’s easy to put on is an important consideration. As you start to become a frequent user of the backcountry, think about a first aid and repair kit.
Shoot. I have the gear but my course is in two weeks and my friends want to take me backcountry skiing this weekend.
Absolutely fine and just as strongly encouraged IF your friends have some education too. It’s always fun to learn from friends. After all, the reason you’ve gotten this far is presumably so you can ski in the backcountry with them anyways….right?
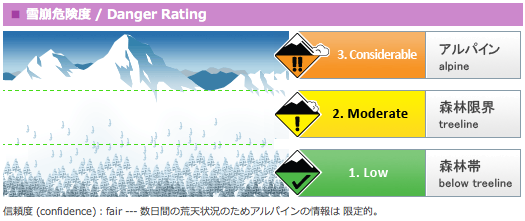
One very important consideration: If you are going out with friends more educated than you, STILL check the morning avalanche report. Forecasters are knowledgeable and provide useful information about which slopes will be safe to ski and what terrain you should avoid. Not sure how to find an avalanche report? A simple google of ‘nadare (avalanche in Japanese) + whichever resort you are skiing near’ should be helpful. For example, there is a Niseko avalanche report located here, which was found by googling ‘nadare niseko’.
But I’ve skied backcountry before and not had a beacon or any of this gear you talk about. I’ve never taken a course and I’m only poking out of gates a little bit. Do I really need any of this?
Simply so I don’t sound like your mother or grandmother, I will clear the air and admit that technically, maybe you don’t. A beacon, shovel, and probe are simply equipment you can put to use if something goes wrong. That said, anybody you ask will agree you should never go into the backcountry without at least a beacon, shovel, probe, and some proper education. Much like a first aid kit, the idea is that they are great tools one hopes never to use. Also much like a first aid kit, they don’t do you any good if they are left at home or you don’t know how to use them. Plus there’s that annoying adage mothers and grandmothers use about an ounce of prevention. As mentioned earlier, the backcountry is full of hazards and unexpected scenarios. That’s part of the fun. It’s also part of the risk you have to accept. Think of it like a seatbelt. They’re annoying to wear and we all neglect to put ours on from time to time on short drives around town. And, much more often than not, we arrive safely at our destination not needing the seatbelt. However, there are many factors one can’t control on the road, much like in the mountains. Accidents happen and it always feels better to say you were prepared rather than deal with the unnecessary loss of life or limb because you weren’t.
Interested in Backcountry Skiing in Japan? Contact us and we can arrange Backcountry Days in Hakuba, Myoko Kogen, or Niseko Japan with qualified guide’s. Cat Skiing in Niseko and AST avalanche courses in Hakuba
I have more questions….
Fantastic. Leave them in the comments below and I will add to this article throughout the summer. Be sure to check back for new information!


